


New article
Recently updated
Creating and managing tasks in ANOMS Noise Analyst Workbench

Who is this article for?Noise analysts who want to create Analysis, Query and Report tasks on the Task Bar.
Access to the ANOMS Noise Analyst Workbench is required. Creating public tasks requires administrator access.
You can create Analysis, Query and Report tasks to organise your work in the ANOMS Noise Analyst Workbench.
Creating an Analysis Task
Before you start, you need a saved layout and a saved query.
To create an Analysis Task:
- In the Task Bar, select a folder for the new task.
- Right-click the folder.
- Point to New.
- Select Analysis Task.
- In the Name box, type a name for the task.
- In the Description box, type a description of the task.
- From the Layout list, select the required layout.
- Choose the query source: Basic (a Load Filtered Data query) or Advanced (a Query Generator query).
- From the Query list, select the required query.
- If required, select Show count on Task Bar to display the total number of rows returned by the parent browser next to the query on the Task Bar.
- To make the task public, click Roles Assignment.
- Select the check box next to each role that should have permission to use this task.
- Click OK.
- Click Save.
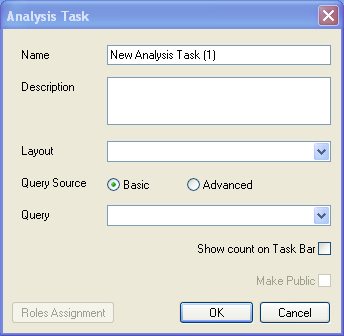
The Analysis Task dialog: name, description, layout, Basic or Advanced query source, and the Show count on Task Bar option
Note: To make a task public, the task must be in the Public Tasks folder, and you need the correct permissions to create public tasks.
Creating a Query Task
Before you start, you need a saved Query Generator query that outputs to Excel.
To create a Query Task:
- In the Task Bar, select a folder for the new task.
- Right-click the folder.
- Point to New.
- Select Query Task.
- In the Name box, type a name for the task.
- In the Description box, type a description of the task.
- From the Query list, select the required query.
- If required, select Show count on Task Bar.
- To make the task public, click Roles Assignment.
- Select the check box next to each role that should have permission to use this task.
- Click OK.
- Click Save.
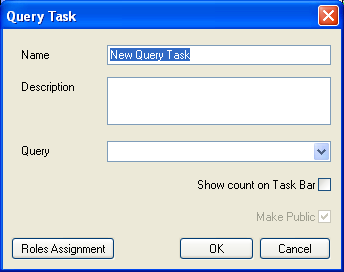
The Query Task dialog: name, description, query selection and the Show count on Task Bar option
Creating a Report Task
A Report Task must be associated with a Report Topic. Create the report, publish it to a Report Topic, then create the Report Task that calls the topic. For creating the topic and publishing the report, see the article Publishing reports with Report Topics.
Note: A Report Task can only have one Report Topic, and a Report Topic can only have one report.
To create a Report Task once the report is published to a topic:
- In the Task Bar, select a folder for the new task.
- Right-click the folder.
- Point to New.
- Select Report Task.
- In the Name box, type a name for the report task.
- In the Description box, type a description of the task.
- From the Report Topic list, select the required topic.
- To make the task public, click Roles Assignment.
- Select the check box next to each role that should have permission to use this task.
- Click OK.
- Click Save.
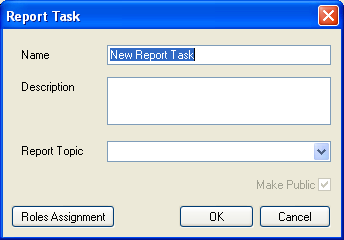
The Report Task dialog: the task is linked to a Report Topic rather than directly to a report
Modifying a task
To modify a task:
- Display the Task Bar.
- Right-click the task you want to modify.
- Click Properties.
- Make the required changes.
- Click OK.
Organising tasks with folders
You can create and delete folders, organise tasks into folders, and copy, paste, move and delete tasks and folders using standard Windows commands and keys. Drag and drop works for moving folders and for moving tasks between folders.
To create a new folder:
- Right-click the Public or Private folder.
- Point to New.
- Click Folder.
Note: You can make a public task private by dragging it from the public folder into the private folder, but you cannot drag a private task into the public folder.
Depending on your assigned role, you will have different permissions for creating, opening, modifying and deleting tasks and folders.
Deleting a task
To delete a task:
- Display the Task Bar.
- Right-click the task you want to delete.
- Click Delete.
- When prompted, confirm the deletion.