


New article
Recently updated
Setting the locator position and managing Points of Interest

Who is this article for?Noise analysts who need to set the map reference point and measure distances.
Access to the ANOMS Noise Analyst Workbench is required.
This article explains how to set the locator position on the Map Browser, configure distance units, display grid lines or range circles, measure distances between points, and create Points of Interest for reference.
Setting the locator position from the map
To set the locator position directly on the map:
- Position the cursor over the required location on the Map Browser.
- Right-click and select Set Locator from the menu.
Setting the locator to a reference point
To snap the locator to an existing Point of Interest:
- Click the Feature Manager button on the Map Browser toolbar.
- Select the Points tab.
- Select the required location from the Points of Interest list.
- Click the Point of Interest on the Map Browser.
- Right-click and choose Set Locator.
- Click Close.
Note: The airport Point of Interest shows the airport ICAO code, latitude, and longitude when you view its map object properties.
Setting the distance unit
To configure the unit of measurement for distances:
- Click the Feature Manager button on the Map Browser toolbar.
- Select the Points tab.
- Select the required unit of measurement from the Distance Unit list.
The map can be scaled to the following units of measurement:
- Feet
- Miles
- Nautical miles
- Metres
- Kilometres
Note: The distance unit is used across the application — for example for Range on the Map Browser, the axis scale in graphs, and the radius in the Track Filter.
Displaying grid lines or range circles
Grid lines and range circles are displayed centred on the locator position.
To display grid lines or range circles:
- Click the Feature Manager button on the Map Browser toolbar.
- Select the Points tab.
- Modify the settings as required by doing one or both of the following:
- Select the Grid Line check box, then type a value in the value box
- Select the Circle Line check box, then type a value in the value box
- Click Close.
Measuring the range between two points
To measure the distance between two points on the map:
- Right-click the first point on the map.
- Select Set Locator.
- Click the second point on the map.
The range is displayed in the map header, along with the latitude and longitude of the point.
Understanding Points of Interest
ANOMS lets you create, store, and reference user-defined Points of Interest — three-dimensional points in space that are displayed on the Map Browser. Grouping Points of Interest lets you quickly visualise similar or related objects, for example hospital helipads.
Points of Interest can include the location elevation, which is then used by other functions:
- Point of Closest Approach (PCA) — the PCA origin elevation takes its value from the location elevation
- Track Filters — the lower range starts from the location elevation
You access Points of Interest via the Feature Manager (Points tab).
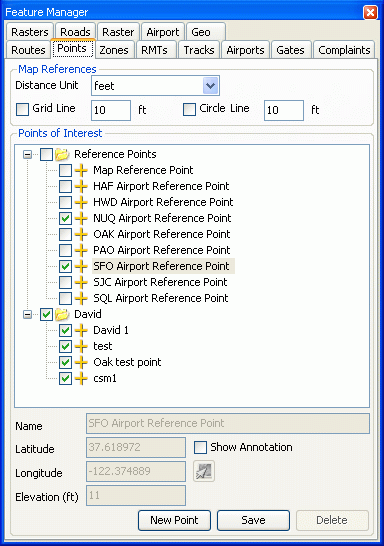
Points of Interest groups and points on the Feature Manager Points tab